The Circle Template Method for Painting Wheels
A popular and easy way to paint round stuff without masking or stencils
Hello and welcome, this tutorial is aimed at the beginning to intermediate model builder, because those are the one's most likely not to have discovered or read about this technique. But, just because it is aimed for the new model builder, doesn't mean this is a technique just for beginners. Many builders use this method without even thinking about it, because it is easy, and with a steady hand, it works great.
This is a great way to paint Vehicle wheels, Armor road wheels, and Aircraft wheels. (some other stuff too but you will have to discover that)
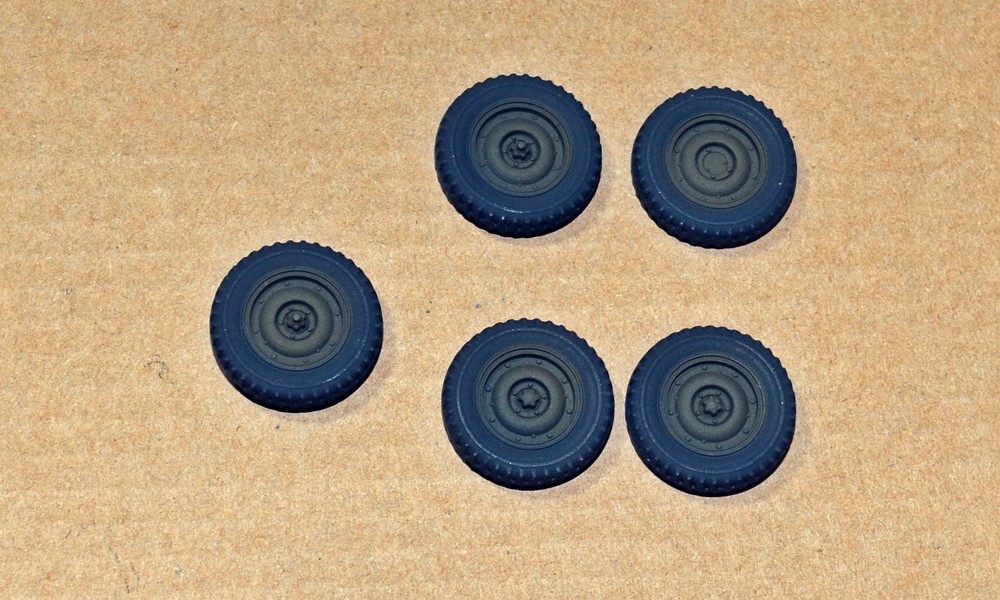
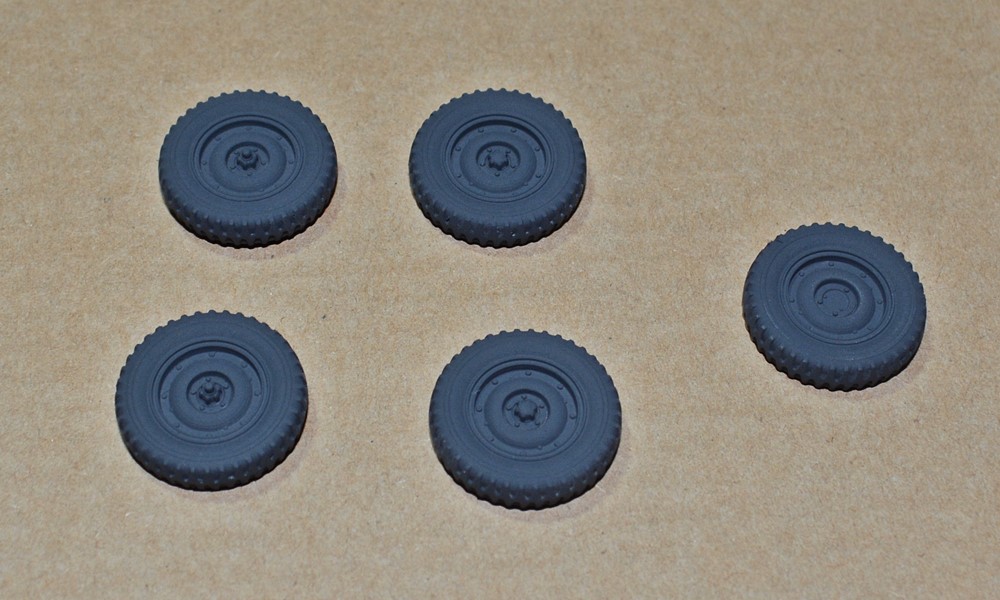
Today we are going to start with the basics, I will not be going into the finishing of the wheels. We have here in photo #1 the wheels for a Bantam BRC-40. They have already been painted in their base color, for which I use Floquil's Weathered Black. I never use pure black for tires as this is unrealistic, tires almost always have a gray tone to them.
Photo #1:
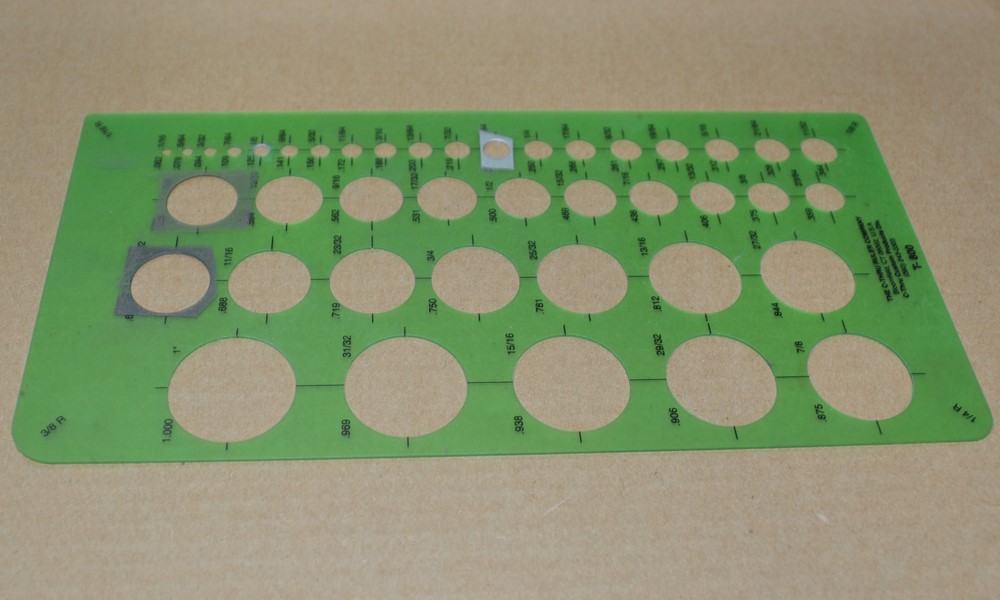
Now in Photo #2 you will see the main item required, the Circle Template, can you see how the method got its name. The Circle Template is easy to find, almost every craft store will have them for a few dollars. I get mine at Michael's or A.C. Moore, or Hobby Lobby, even though it only cost a few bucks, I still use my 40% off coupons, anything saved is a good thing.....LOL.
Photo #2:
Now the next step is important. Take the wheel you are painting, and find the circle that is the closest to the size of the wheel you are painting, so that it leaves the wheel visible, but covers all of the tire. Slightly to small a hole is much better and preferred than anything too big as that will allow the wheel paint to cover the tire. Then mask the area around the one you have chosen. This serves two purposes, first it lets you remember which one you have picked, and two it keeps paint from going though the other circles to get on your tires. See Photo # 3.
Photo #3:
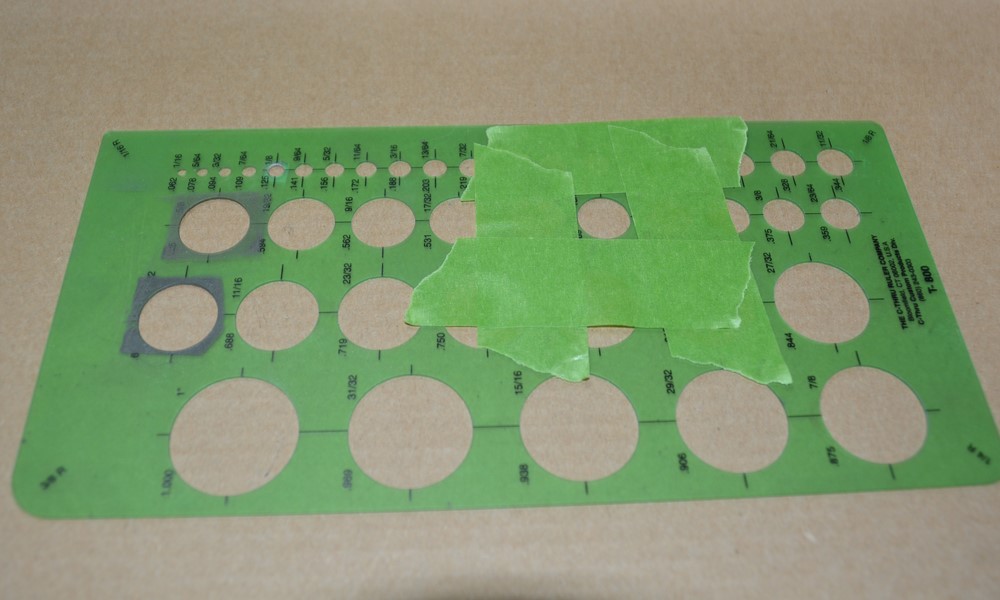
Photo #4, & 5, shows how you are going to hold your circle template while airbrushing in the wheel color in this instance it will be a dark Olive Drab. I will be airbrushing it on lightly so that some of the black color will show through for added depth. The critical thing during this step is to not let your fingers slip and move the tire around so that it is not centered for painting. If your hands are not steady enough you can tape the wheel to the template, but that way can get a little tedious.
Photo #4:
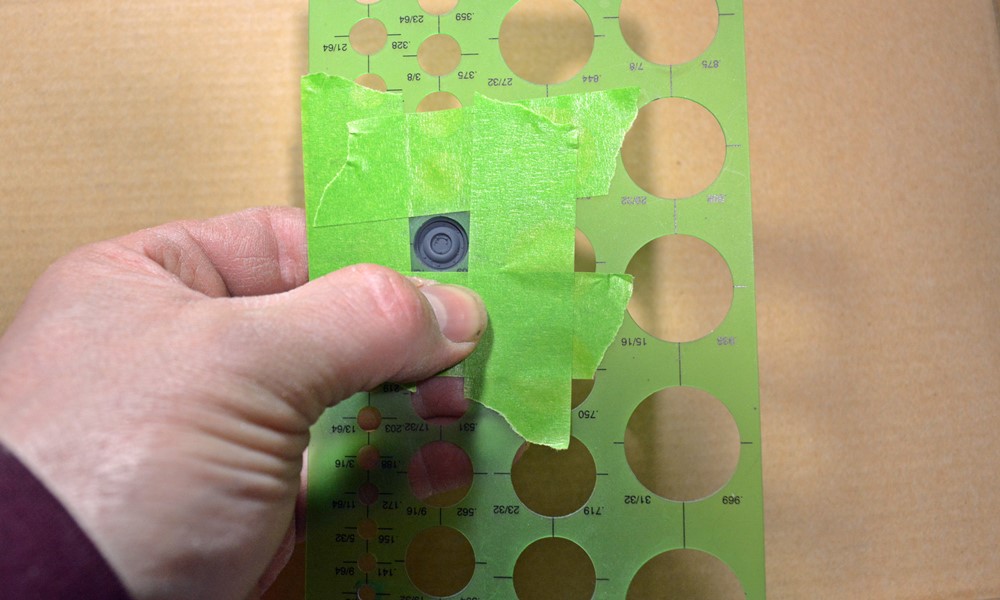
Photo #5:
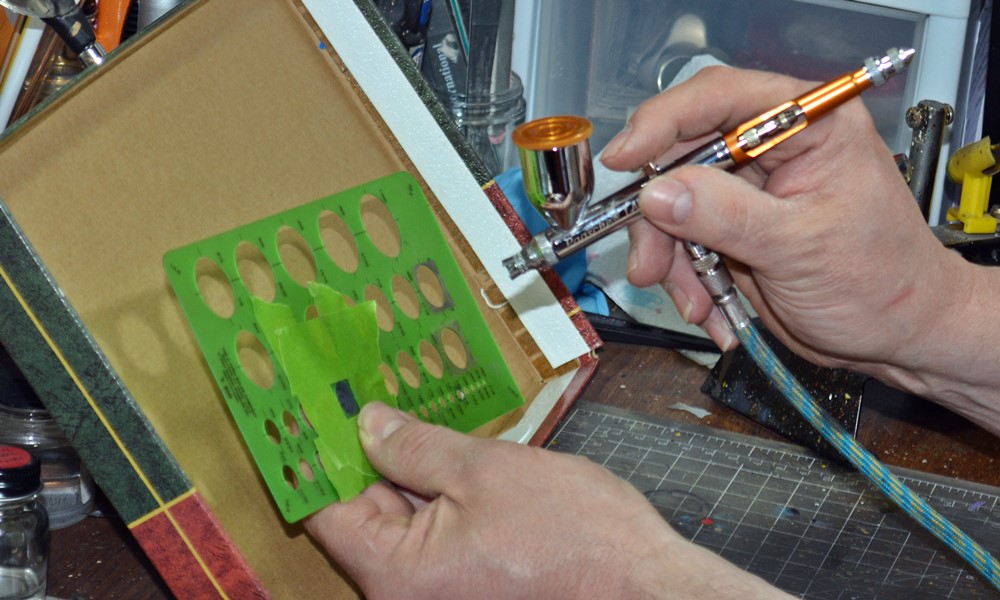
Photo #6 shows the finished work, I do one side let it dry a bit then do the other. and I get perfectly painted wheels and tires. Later on I will airbrush on a lighter Olive Drab as part of my finishing and weathering.
Photo #6: