Introduction to Digital Camera's for Taking Model Photographs
Mission Statement:
First off let me say this, I am not a photographer, I am a model builder. I am writing this article from my own experience, in an attempt to let other model builders know that they too can take decent photo’s of their work using a Digital Camera. This article is designed to give people the knowledge of where to start and the very basics of what is needed in order to do this.
Note: This article was originally published on 1/18/2003 on Armorama.com, so it is now a bit dated and I need to prob update it a bit as I now use a 16mp camera.. :>
Note #2: Article has been updated 11/08/2013..Most of the article is still relevant, just the equipment is better.
The Equipment:
This is the hardest part, deciding what to get. We all want to balance cost with performance here, and get just what we need for the best price. But remember you get what you pay for, so spending an extra $50 here might make that extra difference.
Digital Camera: A camera that saves the image onto a memory chip instead of film. There are several types of Digital cameras on the market, from point and shoot style easy to use camera, up to complicated professional rigs with lots of different lens and a very steep learning curve.
Buying Tips: I can't stress how important this is, do your research, look up Internet tech reviews, read customer feedback, know what you are buying, there are a lot of cameras out there, and some are made with substandard products. You can get good photos with point and shoot cameras, and they start in at less than $100. If you want to go pro then a SLR digital camera can start at $500 and increase from there to thousands of dollars.
MegaPixels: In general the higher the megapixels, the better the photos. However the camera's sensor will also play a role in how the photos are, so if you have a 8 MP camera with a great sensor, and a 16 MP camera made with a cheap sensor, the 8 MP camera might give you better photos. The higher megapixel setting you use, the more digital noise you intoduce into the photo. Also your camera's lens quaility will affect your photos. I started out taking decent photos with a 2 megapixel camera, and now take pretty good photos with a 16 MP camera. If you want to learn more about Megapixels and photos, do a websearch for the topic "Megapixel Myth"
Optical Zoom: This means that the lens themselves move to zoom in on the object, this is a must. A lot of digital camera’s have a digital zoom, this means the image is enlarged after it is taken to make it bigger. A lot of cheaper cameras have this, and it is not a good way to zoom in on detail. For taking pictures of models, an Optical Zoom is a necessity
Macro: Most digital Camera’s have a Macro setting. This is a setting you set when you want to take pictures of an object close up. It helps in the close focusing. For model photography, a Macro setting is another necessity.
Timer: Almost all digital cameras have a timer function, but always remember it is good to make sure. And this is another necessity, as it is pretty much impossible to take great photos if you have to press the button yourself as this will shake the camera and blur your picture.
Resolution: This is the size of the photo you take. A resolution of 800 x 600 is good enough as you will probably have to downsize the photo to post it on the web.
Batteries: This is also very important, as digital cameras eat up a lot of power and the lower the power level the lower the image quality. I recommend spending a little extra on one of the rechargeable setups, in the long run you will save money and can always have freshly charged batteries for your camera. I strongly recommend a camera with a rechargeable Ni-Cad camera battery over a camera that uses regular batteries, in the long run you will same a lot of money.
Tripod: Another item you must have, as you will need something to hold the camera still while the picture is being taken. I use a small tabletop tripod that is about 10 inches high. You can get one of these for about $10 or if you want to spend more you can get a larger one for anywhere from $25 to $50. But I like the tabletop one as it can sit on the same table that I’m using for the model I’m taking a picture of, and can get as close or far away as I like.
Photographing Your Model:
Know Your Camera: because every camera is slightly different, what works great for one camera may not be the best for another. So experiment with the camera you have and learn what it can do. This is not meant to be a set of ironclad rules that have to be followed exactly. This is meant to guide you into a better understanding of what is needed to take good digital photos.
Where to Photograph: Outside. I’ve gotten the best results when I take my pictures outside in natural light. All of my photo’s taken inside always left something to be desired. This is doubly true if you trying to take pictures without the flash, as the flash close up can totally change how the colors of your models look.
What to Photograph on: It is easiest for me to take my pictures on a card table that I set up outside. I cover the table with a sheet as this doesn’t return glare to the model and gives the model a non contrasting background. I use an off white sheet for most of my pictures but a very light blue would be good also. I’ve also had some good results using pieces of white cardboard for a base and background. Remember you want to show off your model, not the yard or street in the background. I use a box to hold up one side of the sheet to keep a background behind the model.
Shadows: Photograph your model to its best advantage. Shadows sometimes add depth but the best teacher of what angle to take your picture at is practice.
Flash: the only thing I can say about this is that when taking pictures up close. Don’t use it as your colors will not come out right.
Macro: always have this setting on when taking a picture of a model up close. It makes a big difference with my camera.
Manual v/s Auto Mode: Most digital cameras have several settings. In Auto mode, the camera tries to get all the settings for you. And depending on the camera this may be good enough. In Manual Mode there are a couple of things you can change that may help improve your pictures such as the White Balance.
White Balance: Many digital cameras allow you to set this in manual mode. I use this when I am taking pictures outside. I set it to sun when it is sunny and to shade when it is cloudy. Again the best way for you to find the best settings for you is practice.
TIps for Taking Model Photos.
Example of a Neutral Background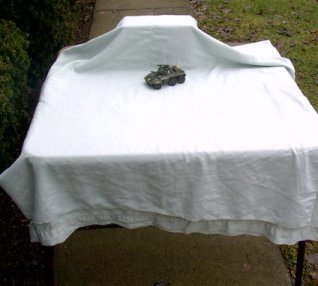
First off you will need yourself a Neutral background for your model. As you can see in the photo to the right, in the early days I used a sheet with a box under it to achive a neutral background.
The 2nd Photo below is a product called, "A Photo Studio in a box", In other words it is a light tent, a couple of photography lights to shine onthe box, a large camera tripod, and your choice of backdrops for use with it They come most often in Blue, Black, Red, and White.
It is a great product for use in area of limited space and when your done it folds up into a small case for storage. These items can be found on the Internet, e-bay, and Amazon.com for anywhere form $40 to $75 depending on the style and size.
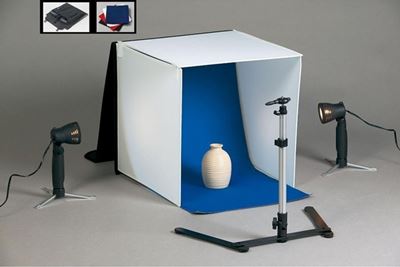 I don't always use the full light tent, sometimes I just grab the backdrop I want and go outside and shoot.
I like to use natural sunlight outside, or using a ott light style daylight light.
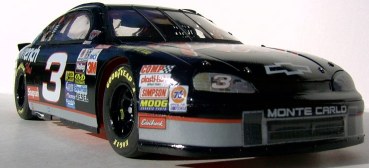
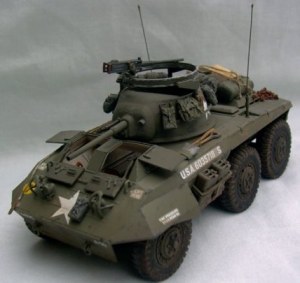
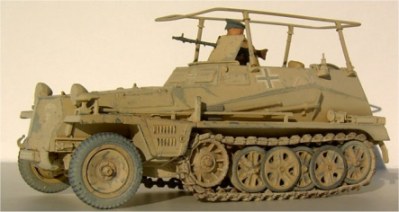
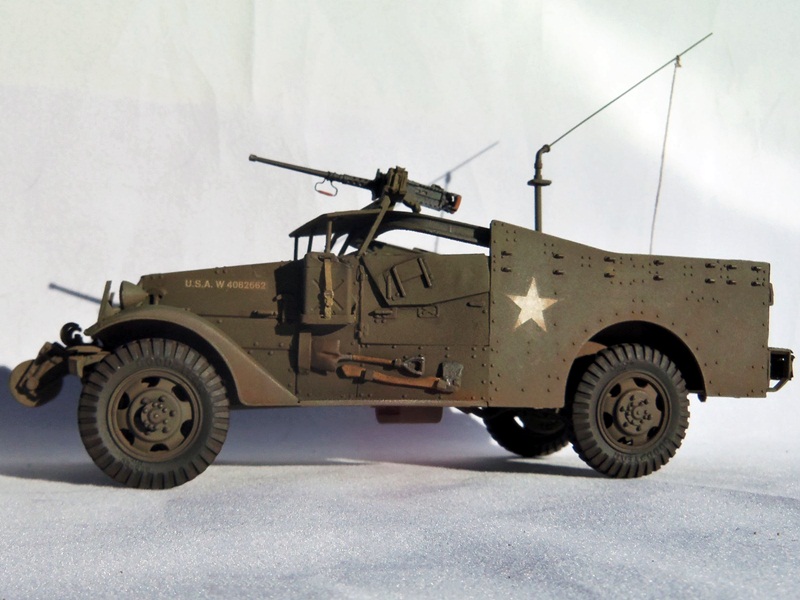
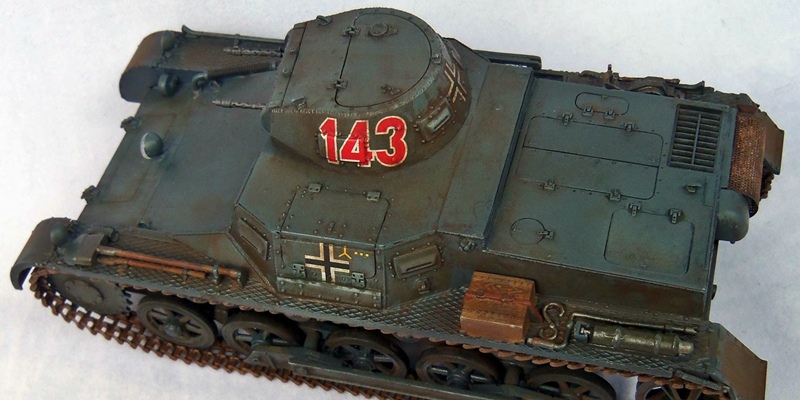
Sample Images:
Newer Images taken with a 12 or 16 Megapixel camera
 \
\
Older Photos taken with a 2 megapixel camera